Contents |
|
For more common issues and fixes, visit the XenonZCar article here
Fuel Level Sending Unit
|
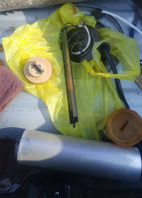
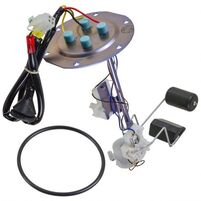
The factory fuel level sending unit is an odd float style unit which typically rusts and goes bad. A few people have had success cleaning the unit by using various products. It is also important to ensure the "fingers" in the float, which contact the central post for the level reading, are clean and making good contact with the post.
|
Analog Sending Unit
Most who have had problems with their sending unit have either stopped using the gas gauge all together and simply go by milage, or have installed Nissan's upgraded unit which is a newer float style unit that is available and plugs in and works perfectly. The part number for the new unit is 25060-17P65 and can be found online for anywhere between $150 and $250 depending on the source.
Note that this unit is the replacement for the Analog Dash and will not work with the digital dash as the resistance values are different between the two.
Note that this unit is the replacement for the Analog Dash and will not work with the digital dash as the resistance values are different between the two.
Digital Dash Sending Unit
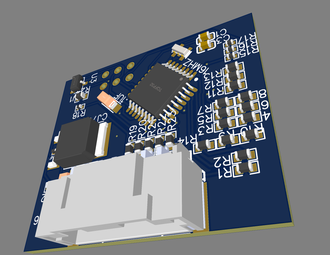
Previously there has been no solution to a failed digital dash fuel level sending unit other than finding a working stock unit from a parts car and these have become increasingly rare. However, with some technical wizardry, our good friend Justin Copenhaver at Cogware.net has developed a conversion board which converts the analog sending unit signal into a digital signal so it is possible to run an analog fuel level sending unit in a digital dash car.
There are two options available from Justin. One for a stock Analog car sending unit, and one for a generic unit that can be purchased on sites like Amazon or Ebay.
There are two options available from Justin. One for a stock Analog car sending unit, and one for a generic unit that can be purchased on sites like Amazon or Ebay.
Leaking Tail Lights
If you just got your Z31 and you go to check out the spare tire area in the rear hatch, you may notice a pool of water or possibly a muddy area where the tire sits. This is caused by a failed seal around the tail lights. Resealing them is important to keep rust out of your car, but luckily it's quite easy.
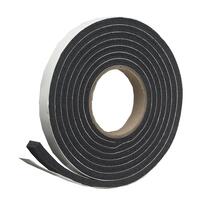
There are 2 methods of resealing your lights. As discussed in the linked video, the first way is to use a weather stripping foam. I prefer this method as it is clean and easy to remove from the car and tail light should you ever need to take them out again. The foam molds easily around the tail light and sticks well. I have not had any problems with my tail light since I resealed it almost 4 years ago.
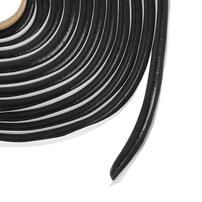
The second method is to use the same material Nissan used during assembly called butyl which has a thick rubberized tar-like consistency. 3M makes a good butyl rope perfect for resealing the tail lights of the Z31. The best way to remove the old butyl from the car to prepare the surface for the new weather stripping is using acetone, however if you use too much of it it can cause damage to the paint. Others have reported success using WD-40 and various other cleaning products.
Cruise Control Wont Work/
Tail Lights Stay On
At one point while driving your Z31, you may notice that your brake lights are staying on even when you aren't pressing the pedal. Or similarly, you aren't able to engage cruise control under standard circumstances where you used to be able to. The problem is most likely a small plastic stopper attacked to your brake pedal and clutch pedal (if you have a manual transmission) which press switches to activate the brake lights and cruise control.
It is possible to use home made solutions to these stoppers such as taping coins to the pedal, however the parts to fix it are cheap and still readily available. The part numbers needed are: 46584-S0100 for the brake pedal (2 needed if both brake light and cruise control are broken) and 46512-H0101 for the clutch pedal. Because these pieces are so cheap, its best to order all new replacements at once to save on shipping and then keep any extras in your glove box for the next time one breaks.
It is possible to use home made solutions to these stoppers such as taping coins to the pedal, however the parts to fix it are cheap and still readily available. The part numbers needed are: 46584-S0100 for the brake pedal (2 needed if both brake light and cruise control are broken) and 46512-H0101 for the clutch pedal. Because these pieces are so cheap, its best to order all new replacements at once to save on shipping and then keep any extras in your glove box for the next time one breaks.
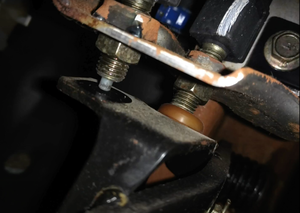
Replacing the stoppers is very easy. Simply follow the pedal upwards under the dash until you see a plate with a hole in it and a sensor poking through it (like the picture). This is where you can also adjust your sensors if needed. Backing them out (away from the pedal) will give the pedal a greater backwards throw. If they had been out of adjustment, it could have been depressing the pedal without you even knowing it. Or if the sensor is too far back and the plastic stopper is not pressing it, you may have intermittent issues with the cruise control or your brake lights occasionally flashing.
Simply popping out any remaining plastic pieces and pressing the new ones in will solve your problem in an instant!
Simply popping out any remaining plastic pieces and pressing the new ones in will solve your problem in an instant!

